Fiberglass planters are a popular choice among landscapers and interior designers, for good reason. While installing fiberglass planters isn't tricky, here are tips to help you do it correctly and ensure you get the most out of your fiberglass planter.
Why Install Fiberglass Planters?
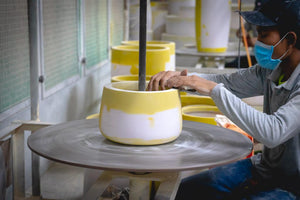
To start with, fiberglass planters are extremely lightweight so they are easy to move around and maintain. They are also weatherproof, rustproof, and shatterproof. This means you may leave the planters outside whether it's snowing, pouring, or bright and sunny. Learn more about the manufacturing of our fiberglass planters.
Furthermore, high-quality fiberglass planters are low maintenance - you won't have to worry about painting or staining them every year, which is beneficial for you in the long run.
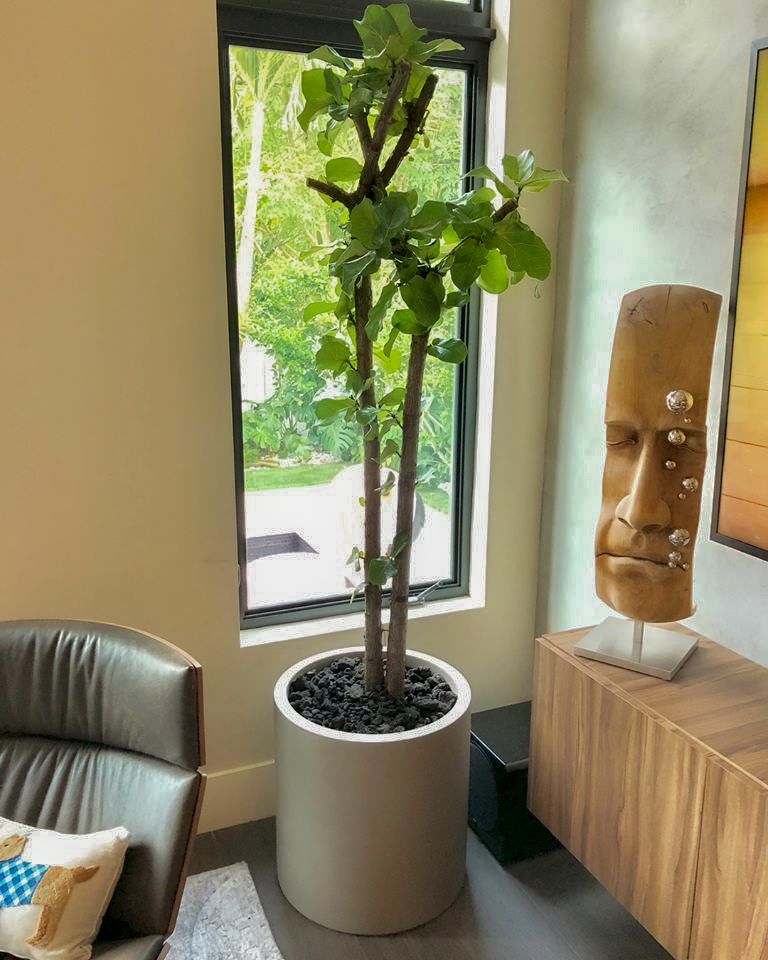
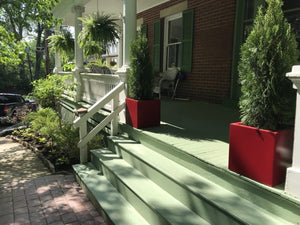
Fiberglass planters also come in a variety of shapes and paint finishes to match any home or business décor, so they're perfect for both interior and exterior use. Landscapers and interior designers love working with fiberglass planters because they offer endless possibilities for creativity.
Without a doubt, a fiberglass planter is the best option to spice up your property. This article will guide you step by step to perfectly install fiberglass planters into your landscape!
Learn more about the 5 benefits of fiberglass!
How To Install Your Fiberglass Plant Containers
Installing fiberglass planters is a great way to add greenery to your indoor and outdoor space without the weight or hassle of traditional potted plants. Unlike other materials, such as metal, stone, concrete, or terracotta, fiberglass has a much lighter weight, making it effortless to move your fiberglass containers around in the garden, on the patio, indoors, or even on the roof.
Here's a quick guide on how to install fiberglass planters:
- Choose a location for your planter. Fiberglass pots are very versatile and can be placed indoors or outdoors. Keep in mind that fiberglass is a porous material, so if you're using your planter for an indoor plant, make sure to place it in a well-ventilated area. Though with our special finish and coating, all our planters are sealed and weatherproof so this particular point would not be an issue.
- Prepare the location you've chosen by cleaning the surface and making sure it's level. If you're placing your fiberglass planter on a hard surface like concrete, tile, or linoleum, consider using felt pads or another type of padding to protect the bottom of the pot from scratches.
- Place your fiberglass planter in the desired location and fill it with potting soil. Be sure to leave enough room at the top of the pot for plant roots and growth.
- Add your plants and water them well. For best results, choose plants that are suited for fiberglass planters and that won't outgrow the pot quickly. Be sure to check the drainage holes in the bottom of your fiberglass planter to make sure they're not blocked before watering.
Whether used indoors or outdoors, our fiberglass planters can withstand all weather conditions, foot traffic, UV rays, and other elements while providing a beautiful base for plant designs. Because of their durability and versatility, fiberglass planters are typically used for a wide range of commercial applications. With proper care, your fiberglass planters will last for many years!
Want fiberglass planters but worried about the upkeep? Don’t worry, fiberglass planter maintenance is easy.
How to fill small and large fiberglass planters
Planters are a great way to add color and life to your home or office. But before you can enjoy the aesthetic appeal of your planters, you need to fill them up! Here's a quick guide on how to fill planters for the best results.
Not sure what size plant pot you have or need? Read our guide to the best planter sizes!
Use potting mix for small fiberglass planters
One way to fill small fiberglass planters is to use a potting mix. Potting mix is lightweight and well-drained soil that is perfect for small fiberglass plant containers. To use potting mix, simply add it to your container and plant your plants as usual.
Another way to fill small fiberglass planters is to use a mixture of sand, peat moss, and perlite. This mixture will provide good drainage for your plants while still allowing them to get the moisture they need. Simply mix together equal parts of each ingredient and add them to your containers.
To keep your plants healthy, be sure to water them regularly and give them plenty of sunlight. With a little care, your plants will thrive in their small space.
What to fill in your large fiberglass planters
Lightweight Pot Fillers
Consider the mobility requirements of your container garden. Clay, ceramic, and porcelain pots, as well as concrete or stone containers, are already heavy materials. The additional weight of potting soil will make it challenging to transport even the lightest pots on the market, plastic planters, and fiberglass containers.
Compostable materials:
- Fiber from coconut
- Cups made of paper
- Chips of wood
- Moss Sphagnum
- Cardboard scraps recycled
- Pinecones
Materials that aren't biodegradable:
- Packing peanuts/Styrofoam peanuts
- Cans of soda, crushed
- Blocks of foam
- Milk jars made of plastic
- Bottles/containers made of plastic
- The bubble wrap
- Discarded plastic
Heavy Pot Fillers
Weighted pots are ideal for use as a bulwark or barrier in planters. There are other compelling reasons to keep big, immovable containers in your commercial or household area. If you're worried about theft, a decent hefty planter will help. This might be true if you use them as a property barrier or a parking lot divider.
Compostable materials:
- Wooden logs
- broken ceramics
- Branches from a tree
Non-biodegradable materials:
- Massive boulders
- Broken concrete fragments
- Gravel
- Sand
- Pebbles made of glass
- Bottles of beer or wine that have been emptied
Compostable or Non-Biodegradable Pot Fillers
Organic fillers degrade over time, which can be beneficial to plant development. As the pine cones or wood logs degrade, they release nutrients into the soil, functioning as a natural fertilizer.
Non-biodegradable materials, such as milk bottles and styrofoam blocks, can clog the bottom of your huge planter for a long time. This is an excellent method to repurpose outdated objects that might otherwise wind up in landfills.
However, keep in mind that stagnant water in plastic bottles and jugs might contain and transfer germs to the plant. If you are planting an edible garden (planting veggies or fruit for consumption), be especially aware of the filler material.
Fiberglass planters with and without drainage holes
Consider drainage and drainage holes when choosing a fiberglass planter since they are crucial to the health and lifespan of your plants. Houseplants can suffer severe damage and possibly die from improper drainage holes.
But don't worry, this article will show you how to grow plants in containers without drainage holes and how to care for your plants.
Are drainage holes necessary for fiberglass planters?
As a general rule, drainage holes in your plant container are recommended. Having at least one drainage hole at the bottom of your planter promotes healthy development by allowing excess water to drain and air to circulate through the soil.
However, beautiful and well-designed conventional and bespoke planters may not always feature drainage holes. The main purpose is to create a neat and professional plant display without making a wet mess on the floor.
Planters with drainage holes
Basically, proper drainage holes are beneficial for your plant for four key reasons.
- Removes excess water: drainage holes facilitate the movement of all that extra water through the soil. While certain plants need wet or moist soil, too much water can promote root rot and ultimately cause the loss of your plant.
- Ensures adequate airflow: Airflow is very important for your plant and soil. Even though your soil surface is visible at the top, you may still want a drainage hole at the bottom to allow air to circulate through the soil.
- A constant flow of water reduces salt accumulation: the drainage hole at the bottom of the pot will help your plant drain off any excess salts that can harm the roots if they are allowed to accumulate and dry up the soil.
- Prevents underwatering: Along with overwatering, the reverse issue might also arise. If you're aware that your pot doesn't have any drainage holes, you could underwater your plant in an effort to save it from drowning, which is just as harmful as overwatering!
Planters without drainage holes
Aesthetic is the main factor for having planters without drainage holes.
There are obvious commercial reasons why individuals don't want to risk contaminated water flowing freely from their plant displays, even if this sounds like a stupid excuse to compromise plant health and endanger death.
Most plants, whether they are grown inside or outdoors, require drainage holes to keep water from collecting at the bottom of the pot, where it can breed bacteria and fungi and cause your plant's roots to rot.
Naturally, all of this needs to be avoided. Planning your planters or concentrating on utilizing rocks or appropriate soil with adequate drainage may need a little extra effort from time to time.
Improper drainage holes may leave both your fiberglass container and plants in bad condition, if you're not sure if you need drainage holes, or would like to discuss adding them to your order, simply contact our consultants for all your planters' requirements, from painting to drilling drainage holes!
Watering your fiberglass planters
The simplest technique to determine whether your plant needs watering is to bury your finger in the soil for about 6 inches. You don't need to water it if the soil is still moist.
Now that you know how frequently your plants require additional watering, you need to create a schedule. This will reduce any resource wastage, including excessive watering, and, most importantly, save your expenditure.
Residential watering tips
Mulching
Watering plants liberally and then covering them with mulch is a tried-and-true approach for keeping the potting soil wet.
The mulch will not only keep weeds at bay but will also aid to minimize evaporation from the topsoil and reduce heat loss during the day. The soil retains moisture for a longer period of time.
Sprinklers
A sprinkler is an excellent tool for reaching hundreds of planters and vast areas of the garden. Connect a sprinkler line to your outside faucet and turn on the water. Make sure your sprinkler head or adjustable nozzle has adequate pressure to simultaneously reach every planter in your garden and the entire area.
The simple garden hose
Connect a garden hose to your outside faucet and run it at half-power. Use a hose nozzle to deliver water to each plant container, but be cautious not to over-water the plant's leaves or stem.
A prolonged soak will be beneficial for each fiberglass pot so that moisture may get to the root zone. To directly target the plant's roots, you may even bury the tube in the bottom of the fiberglass pot. This arrangement is more effective than a sprinkler and conserves water.
Commercial watering tips
Watering timers
One way to keep your outside area green all year is to use a timer. Your sprinkler or hose will turn on at a specific time each day if you just attach the timer to it, set the timer for 15 minutes, and then turn it on (but better in the morning).
If you are working in a hot and sunny setting, you will need to increase the average watering time since moisture will evaporate faster. These timers are perfect if you want to water your outdoor plants when it's convenient for you.
Using a Smart Controller
Investing in a smart controller that allows you to schedule watering and is another way to cut costs. Additionally, these controllers have sensors that track the weather and turn it on automatically as needed.
This means they turn off during cold weather to avoid costly frozen pipes, preserve during wet seasons, and avoid high demand times without the need for human intervention.
Drip irrigation systems
Drip irrigation systems are an excellent choice for gardeners and companies that want to ensure that their plants receive the appropriate quantity of water while minimizing waste.
Drip irrigation systems deliver little amounts of water straight to plant roots through small holes in flexible plastic hoses. This technique is intended for huge projects requiring extensive water distribution.
Many are also compatible with mobile applications and software, allowing you to monitor your water use and settings on your smartphone or tablet.
Drip irrigation systems are divided into two types: surface drip and subsurface drip. The most prevalent kind is surface drip.
- Surface drip systems: The system comprises a plastic water pipe put on or just below the soil surface and equipped with emitters uniformly distributed throughout its length to give water to individual plants. Create a network of these pipes, and watering a huge growing area becomes considerably faster.
- Subsurface drip systems: The subsurface drip needs a somewhat more sophisticated installation, but it's ideal for conserving water by sending it deep into the earth where the roots are, such as in a food garden. This style is better suited to traditional gardening without the use of containers.
JBD Concepts Offer You Or Your Customers The Best Planter Solutions Available
All of our planters come with an industry-leading warranty for both residential and commercial use giving you peace of mind that your investment is safe, and that the form, function, and beauty of your new planter will last beyond expectations.
Are you a landscape architect or designer and want to get more customers with our planters? Contact us today to learn more about the exciting opportunities our wholesale range can deliver!
All our planters are available for retail customers too. Simply visit our store, select your planters, size, and finish and enjoy incredible value at affordable prices!
Shop now and begin improving your space!


